Monday, November 16, 2009

Poached Pear Tart

Wow did my apartment smell good while I was making this! They should make a candle that embodies the smell of pears poaching in a pot of wine, sugar and spices. Or I could just make this all the time...

So I offered this tart up as one of the many pies I'm selling for Thanksgiving this year, but hadn't really decided on a recipe for it yet, just knew it could be done, and that I would do it. So I experimented and came up with this pretty keen combination. I followed a recipe posted on Epicurious fairly closely, but with some modifications. First and fore most, I had created a poached pear crepe last year that had a honey mascarpone filling, so figured I'd work with that some how in the tart. I also love almond and almond flavors, so swapped out the called for pistachios and used almond meal in it's place.

This is what I came up with:

Pastry cream
  • 2/3 cup almond meal
  • 6 tablespoons sugar, divided
  • 1 tbs honey
  • 1/3 cup milk
  • 1 8oz pkg mascarpone cheese
  • 4 egg yolks
  • 3 tablespoons cornstarch
  • 5 tablespoons whipping cream
In medium sized saucepan, place 3 tbsp sugar, almond meal, honey mascarpone and milk and bring to boil. At first, I was concerned about whether or not the cheese would boil or melt, but it worked out just fine. In separate bowl, whisk remaining 3 tbs sugar, yolks, and cornstarch and blend. Gradually whisk 1/2 cup hot milk mixture into yolk mixture. Return to milk mixture and whisk constantly over medium-high heat until mixture boils and thickens, about 1 minute. Remove from heat. Transfer mixture to a bowl; press plastic wrap directly onto surface. Cover and chill. Stir in cream. (Can be made 2 days ahead. Keep chilled.)

Poached pears
  • 1/2 bottle fruity red wine (such as Zinfandel)
  • 1 cup sugar
  • 1 tsp lemon zest
  • 1 cinnamon stick
  • 1 sage leaf (remove after 10 minutes of boiling, or so)
  • 4 medium-size firm but ripe pears peeled, with core and stem removed
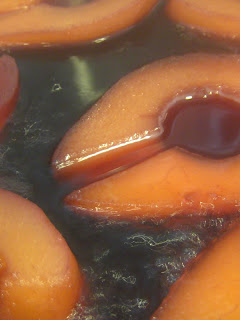
Add all ingredients to a large pot and bring to simmer. Depending on the ripeness of the pears, simmer for 30 minutes up to 1 hour. Transfer pears to a separate dish and reserve poaching liquid to boil down to a syrup for serving, to reboil more pears later, or to discard. Cool pears to room temperature. (Pears can be prepared 2 days ahead. Cover and refrigerate.)

Crust
• 1 1/2 cups all purpose flour
• 1/2 cup powdered sugar
• 1/4 teaspoon salt
• 9 tablespoons chilled unsalted butter, cut into 1/2-inch cubes
• 1 large egg yolk

Preheat oven to 375°F. Blend flour, sugar, and salt in food processor. Add butter and pulse until mixture resembles coarse meal. Add egg yolk and pulse until moist clumps form. Press dough onto bottom and up sides of prepared pan tart pan. Freeze crust 15 minutes.

Bake crust until golden brown, about 20 minutes. Cool completely in pan on rack. (Can be made 1 day ahead. Let stand at room temperature.)

Once all ingredients are ready, smooth a layer of pastry cream into the pie shell, and top with slices of poached pears in a decorative manner. It is best to pat the pears dry before arranging on the tart. I had the better part of a pear leftover when I was done arranging my tart, but it worked out since I was able to choose only the prettiest pieces of pear to lay on my tart, and will gladly gobble up the rest of the pears, or maybe use them in a recipe in the next day or so. They really are super tasty.

It was shown in the previous recipe that they arranged their pears in a rosette-like formation, which looked very pretty, but I couldn't quite get myself to do it. I just love the fan-like look of the fruit tarts.

Anyhow, now that I've come up with a recipe, I feel better about offering to make them for people's thanksgiving dinners!

Friday, November 6, 2009

Maple Pecan Pie


It's high time for pie time!

Pies are amazing. I especially love a good pumpkin pie, but honestly, just use the Libby's recipe, so there's not much to blog about. But I do have a very special Pecan Pie recipe that I have every intention of sharing.

Inspired originally by my dear friend, Liz, who is always so willing to accommodate those with special dietary restrictions. She made a pecan pie that used no processed sugars. Knowing that most of the recipes out there for Pecan Pie are 80% corn syrup does make them high on the processed sugars list. Our friend who had this restriction did say that Maple syrup was natural, therefore he would eat it. Bingo. With a little experimentation, she whipped up a batch of pecan pie tarts using only maple syrup in place of the corn syrup. I was skeptical at first, thinking they would taste like a gallon of maple syrup with some pecans thrown in, but I was sure wrong. Delicately sweet, chewy, and super nutty, they fulfilled everything you'd ever want from a pecan pie, and were actually not as painfully sweet as their corn syrup counterparts. Nor was the flavor overwhelmingly mapley. I mean, I like maple syrup, but I do have my limits on how much of it I can take in.

It did take me a couple years to make my own version, but well worth the wait. Adapted from a recipe on Simply Recipes.

Ingredients
  • 2 eggs, slightly beaten

  • 1 cup maple syrup
  • 1/4 cup brown sugar
  • 
1 tbsp molasses

  • 2 tbsp melted butter

  • 2 tbsp flour

  • 1/4 teaspoon salt

  • 1 tsp bourbon or brandy
  • 1 1/4 cups pecans (enough to cover bottom of pie tin)
  • 1 Removable bottom tart pan lined with pastry crust
Preheat oven to 375°F. Spread pecans along the bottom of the pie shell. I tend to be meticulous about it and fan them out from the center, but then am disappointed when I pour the mix over the nuts and they proceed to be displaced chaotically. Just a warning, if you happen to be a perfectionist.
Mix the remaining ingredients and pour over pecans. The pecans will rise to the surface.
Bake at 375°F for 45-50 minutes until the filling has set.
Cool completely.
Cutting can be messy, because I keep the pecans whole, so you have to chop through the whole nut AND crust. You can of course chop them before you put them on the pie crust.

I use a trusted pie crust recipe that is basically 1/2 cup of butter to each cup of flour, with a tsp of salt and sugar tossed in. I keep some of the butter chunks pretty big too, which makes the crust super flaky (but reliable - how ironic!).

I hope you enjoy this treat as much as I do. It definitely competes with pumpkin pie in the ranks of my favorites. But apple is so good too.... ooh, Dutch Apple. mmm. I guess I have more posts to work on.

Friday, October 30, 2009

Caramel Spiderweb Chocolate Cupcakes

Happy Halloween!

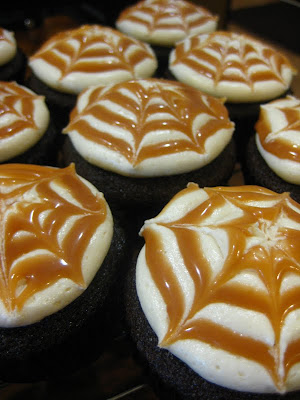
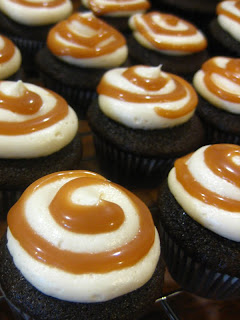
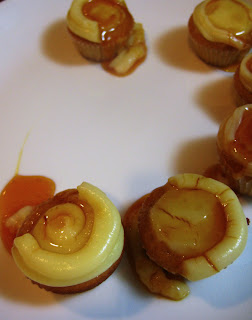
This week I did a festive chocolate cupcake with caramel buttercream and caramel swirl topping, with a little spiderweb style.

The caramel sauce turned out quite tasty. I followed a food network recipe from the Barefoot Contessa, Ina Garten. It was nice because it didn't require candy thermometers.

Carmel Sauce

• 1 1/2 cups sugar
• 1/3 cup water
• 1 1/4 to 1 1/2 cups heavy cream
• 1/2 teaspoon pure vanilla extract

Mix the water and sugar in a large heavy-bottomed saucepan. Cook over low heat until the sugar dissolves. Increase the heat and boil uncovered until the sugar turns a medium brown, about 5 to 7 minutes, stirring occasionally with a wooden spoon. Watch it carefully at the end, as it will go from caramel to burnt very quickly. Stand back to avoid splattering, and gradually add the cream and vanilla extract. Simmer until the caramel dissolves and the sauce is smooth and thick, about 2 minutes. Serve warm, or add another 1/4 cup of heavy cream and serve room temperature.

Just a note, don't try and make a smaller batch. I did the other week, and it became an overheated mess of stringy caramel and chunks. Not very appealing. Other than that, the 1/4 cup of cream after it's been removed from the heat is also important for keeping it from crystalizing too much.

Ok, so I took my Devil's food cake recipe and experimented with a couple of the cupcakes by putting a dollop of the caramel sauce in the middle of them before baking. Results varied. Most of the cupcakes reacted by getting a gaping hole in the center/bottom of the cupcake and leaving a crispy sugar crust on the wrapper where it decided to go when baked. From what I heard, it did make those cupcakes extra moist, but am not sure it was worth it due to the fact it left some parts hard to eat or... empty.

So, I just kept the rest of it straight-forward and made an easy caramel buttercream with the sauce.

Caramel Buttercream
1 cup butter, room temperature
approximately 4 cups of powdered sugar
1/4 C + caramel sauce
milk

Beat butter until smooth and add powdered sugar 1 cup at a time until frosting is thick and almost crumbly. Add caramel sauce a little bit at time until you reach the desired consistency. I did add a little cream (you could use milk) to help smooth it out a bit too.

Warning, it's very sweet. I'm sure this would go well as a cream cheese frosting too, to cut down on the sugar content a bit.

After I piped the buttercream on the cupcakes, I took a pastry bag with a small round attachment and filled it with the remaining caramel sauce, swirling it on top of the cupcakes. Then with a toothpick, I pulled the frosting and caramel down in little spiderweb like trails from the center of each cupcake, achieving the desired effect.

Yay Halloween!

Friday, October 23, 2009

Apple Cider Cupcakes

Ah. Fall. How I love thee.

This time it's tasty Apple Cider Cupcakes with a delectable spicy cream cheese glaze and apple cutout. My friend Kristy sent me this recipe a year ago and I made it then, before I really jumped on the cupcake bandwagon. They were SO delicious and I remembered them a year later just as I saw the apple cider hitting the supermarket aisles.

I did do a little research on some other apple cider cupcake recipes posted online, and I modified the original slightly and was very please with the results. There's really nothing better, in my opinion, than having a spicy cupcake loaded with chunks of juicy apples. I also liked having the apple cider reduction ready to go for the cupcakes as well as the frosting. It really intensified the flavor. I actually used Trader Joe's "spicy cider" which already has a lot of flavor in it.

  • 2 eggs, at room temperature*
  • 1 2/3 cup flour
  • 1 cup apple cider**
  • 2/3 cup sugar
  • 1/2 cup butter, at room temperature
  • 2 teaspoons baking powder
  • 1 teaspoon cinnamon
  • 1/2 teaspoon salt
  • 1/2 -1 granny smith apple, cored, peeled and cut into 1/4-1/2 inch chunks

Preheat oven to 350˚. Grease or line 12-16 cupcake wells. In large bowl, cream together butter and sugar. Add eggs, beat well. Combine the baking powder, cinnamon and salt to the flour and add to the butter mixture alternately with the apple cider until thoroughly combined. Mix in apple chunks. Pour into prepared cupcake pan, filling each cup 3/4 way full. Bake 20 minutes or until the tops spring back when lightly touched.

Cider Cream Cheese Frosting
  • 1 cup apple cider

  • 4 oz. cream cheese, softened but still cool

  • 1 - 2 cups powdered sugar

  • a pinch of salt

Put the apple cider in a small pan and bring to a boil over high heat. Continue to boil until the cider is reduced to about 2 tablespoons (it will be slightly syrupy). Set aside to cool completely.

With an electric mixer, beat together cooled reduced cider, cream cheese, pinch of salt, and 1 cup of the powdered sugar. Add enough additional powdered sugar for desired frosting texture.

* I learned a neato trick with room temperature eggs. If I don't have enough time ahead to get them to room temperature, you can place your refrigerated eggs into a small glass of warm water for about 30 seconds-minute to bring them to room temperature. The science of eggs is that cold eggs separate more easily, and room temperature eggs will fluff and incorporate air more easily than cold ones which is good for a lighter cupcake.

** I read a recipe online that suggested using 2-3 cups of cider and boiling it down to the approximately 1 cup you'd need for the the cupcakes. If you have enough time ahead, I recommend it because it really packs in a whole lot more flavor. And you can just make enough for the frosting at the same time while you're at it.

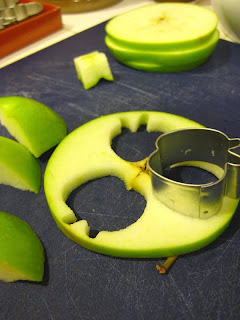
My little added touch was the apple cutout on top. I took a granny smith and used a handy little apple shaped cookie cutter that happened to be the right size, and was able to pop out the shapes from the apple slices. I actually just used the remnants of that apple as the chunks in the cake, which worked out to be about half an apple's worth. I recommend peeling the apple before hand though, something I didn't do.

While I made the cupcakes, I let the apple shapes rest in a bowl of water with a splash of lemon in it to keep them from browning. When the cupcakes were done and cooling, I pan fried the slices with a touch of butter and cinnamon and let them go until they were slightly browned, but not mushy. I did lose a couple in the process, so it's best to have a couple more than you think you'll need.

When the cupcakes were cooled, I made the frosting. It was pretty runny because I was trying to pack in a lot of flavor with the cider syrup, but it was good. I frosted and then placed a nicely browned apple slice on the tops of each of them. Make sure your apple slices have had a chance to cool though, because they will slide around on the cream cheese frosting and melt it if they're not.

A delightfully rich, tangy treat. Enjoy!

Monday, October 12, 2009

Wedding Cupcakes

So, I'm a little delayed in getting these posts complete, but I've been pretty busy in the kitchen and really want to share some of the adventures!

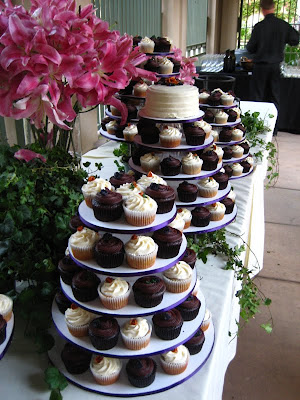
Mainly, I had the pleasure of baking cupcakes for my friends' wedding this September. It was a beautiful wedding down in Pasadena at the CalTech campus where they both went to school.

As Pasadena is nearly a whole state away from me, I had to migrate my kitchen for the weekend in order to accomplish the cupcakes. Transplanting all my tools into the Avery dorm kitchen for a couple days was not as incredible of an undertaking as I imagined, but still quite a hefty chore. I was really grateful that the few kids who were roaming the dormitory halls were very courteous and respectful of me in their space, especially as my cupcakes overwhelmed their common areas, and that the ominous emails the bride-to-be sent to them before my arrival (relating to missing cupcakes) were dutifully noted. I'm not sure how many dorms you could get away with leaving 250 cupcakes lying around overnight without there being some kind of cupcake massacre.

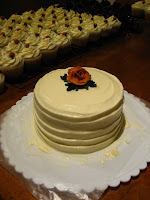
In any case, the task was 125 Banana cupcakes with cream cheese frosting, and 125 Chocolate cupcakes with semi-sweet ganache frosting. I was able to prep a few things beforehand, and did some last minute supply shopping, but mainly just dove right in hoping I'd calculated the quantity of my ingredients correctly. And there were some issues. For example, I had figured I'd need 16 pounds of butter when it was all said and done, but really ended up only using about 10 or 12 pounds. I had to buy 2 more bananas because I had not calculated in the mini-cake I was making (so they'd have a little something to cut into). But overall I was quite pleased with how close I came to my guesses... er... calculations.

So the baking went very smoothly and all the cupcakes were cooled and frosted by 10 or 11 the night before the wedding. The kicker was the little decorations I made on them. Having finished a class in cake decorating, I was feeling pretty good about my buttercream roses, so decided to put a mini one on top of each cupcake. The wedding colors were burnt orange and eggplant purple. So, I thought the orange would look lovely on top of the cream cheese frosting and the purple would go well with the rich chocolatey brown of the ganache. And yeah, I think they did come out looking rather cute. But oh my god did my hand cramp like nothing else! That is a muscle I have yet to develop. So after 3 hours of gently piping one little rose onto my fancy little rose-making spinny-pin, then gently transferring each one to the top of a cupcake and repeating that process until I had a full tray or so of them, then piping on a little stem and leaves to each one of those little rose buds... then, after 250 of those I was able to call it quits. It was that moment I realized using a mouse at work was not going to be the reason why I get carpel tunnel!

But was it worth it? Yeah, I think so. Everyone seemed to really enjoy the cupcakes, and the little girls in their cute little pink dresses at the wedding were in so much awe about them, they had to have been good!

Wednesday, October 7, 2009

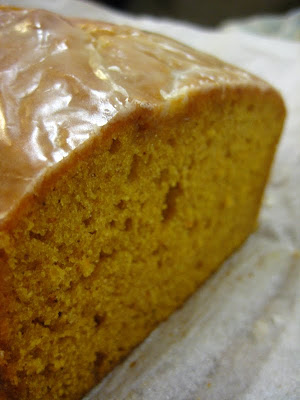
Pumpkin Bread

It's that time of year! I love the fall and all the wonderful flavors it has to offer. I especially adore pumpkins and all the delightful treats you can make with them - sweet and savory. I just love the fall spices and the way they make your home smell when you have something tasty baking in the oven.

To bring in the season properly, I have to bake this notoriously good pumpkin bread recipe that I got, no joke, from my high school cooking class. Luckily, my teacher didn't say it was patented or copyright, so I'm happy to pass it along.

I've tried this with freshly made pumpkin puree, canned, organic, non-organic, you name it, and it's always good. I unfortunately didn't find the quality between fresh and canned pumpkin to be worth the effort of steaming/roasting it myself, so have to go against my desire to make everything from scratch and say it's canned pumpkin all the way for this recipe.

Pumpkin Bread:

Preheat to 350˚
1. Prep baking pans:
  • 3 greased loaf pans (bake for 30-40 minutes)
  • Large loaf pan for (bake for 1 hour)
  • muffin tins (12-24 muffins depending on how full you fill them and bake for 20-30 minutes).
2. Whisk together dry ingredients in large bowl and make a well in the center:

3-1/2 C Flour
2 tsp Baking Soda
1 tsp Salt
1tsp Cinnamon
1tsp Nutmeg
¼ tsp Ginger
1/8 tsp Cloves

3. Mix together liquid ingredients in a medium sized bowl:
3 C Sugar
¾ C Oil
4 Eggs
2/3 C Water
15oz. Can Pumpkin (~2 cups)


4. Add liquid ingredients to the well mix and stir/whisk together until combined.
5. Pour into preferred baking tin(s).
6. Bake recommended times based on pan size. Check doneness with a toothpick. Done when pick comes out clean and the tops are lightly browned.

Optional toppings:

Cinnamon Sugar:
Before baking, sprinkle a mix of 2 tbs sugar and 1 tsp cinnamon over the top of the bread for a crispy baked topping.

Orange Glaze:
After baking (either while warm or when cooled), drizzle a mix of ½ cup powdered sugar and 1-½ tbs orange juice over the bread and allow it to cool.

I definitely recommend and prefer the orange glaze. I really like the cinnamon sugar topping on other breads, such as zucchini, but you really can't go wrong with something like that.

I find this recipe to be stupendously reliable, moist, flavorful, incredibly easy and fast to make, and versatile - you can make it into cupcakes by simply adding cream cheese frosting! Which, on that note, is October's cupcake of the month.

Thursday, September 10, 2009

Wine Cupcakes with Brie-Cream Cheese Frosting

A commissioned cupcake: Red Wine. We brainstormed out how to make this flavor cupcake, and this is what we came up with:

Chocolate cupcake with Zinfandel cream filling, topped with Brie-cream cheese frosting and a drizzle of Zinfandel reduction glaze. It was quite an amazing combination, and definitely a multi-step process.

First, I reduced a couple cups of the Zinfandel so it was more concentrated in flavor. I'd say, turn 2 cups into 1 and you'll have a good amount to work with. You'll need this for the drizzle on top, but also for dipping the cupcake into before you add the filling.

Second, I made the zinfandel cream filling. Using a basic Bavarian cream recipe, I replaced the water with wine and reduced the amount of whip cream needed by about half. Unfortunately, this was REALLY good - so good, I kept having to taste it... you know, to make SURE it was good. Luckily I still had enough (more than enough) left to fill 15 or so cupcakes.

Zinfandel Cream:
In a small bowl, set 1 tbs gelatin in 1/4 c wine (supposed to be cold, but mine was room temp). Let set for at least 10 minutes. In a separate bowl, cream 2 egg yolks, 1/4 C sugar and a pinch of salt. In a saucepan, bring to a boil 1 cup milk and 1 tsp vanilla. Once it has reached a boil, remove from heat. Temper egg solution by scooping about 1/4 C of the milk and whisking it quickly into the egg. Once tempered, slowly pour all egg mixture into the milk and whisk until combined. Whisk in gelatin mixture. Strain, then let cool. Whip in 1/2 C whipped cream once it is set.

Next phase of prep was the brie cream cheese frosting. So, I didn't take the most precise measurements when doing this, but I think I used about 1 cup of brie, 1 8 oz bar of cream cheese and 1/4 C of butter. Whipped those up with about 1 - 1 1/2 cups of powdered sugar, a tablespoon or so of honey, and was happy with the consistency. You can add more sugar, but I felt like it would be better a little more savory. I did trim most of the rind off the brie before mixing it up, but might actually let more of it slip in if I did it next time because it does add that distinctly brie flavor. Just make sure to crumble it finely because chunks of rind will look funny in your frosting.

Last prep, make the reduction glaze by setting aside about 1/4 cup of the reduction and whisking powdered sugar into it until desired consistency.

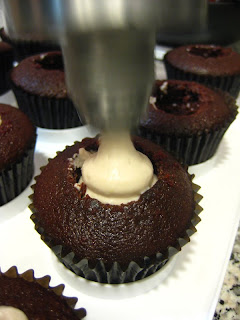
Ok, now you're ready to make cupcakes. I used my basic Devil's food cake recipe as the base of this flavor combo. Once cooled, I scooped out the centers with a melon baller (and tried not to gobble all the discarded cupcake holes up in one bite!). Then dipped all the cupcakes in the remaining reduction and used a pastry brush to get some in on the inside of the cupcake orifices. Then I used my fancy schmancy pastry gun to fill the cupcakes with the Zinfandel cream. Try not to overfill.

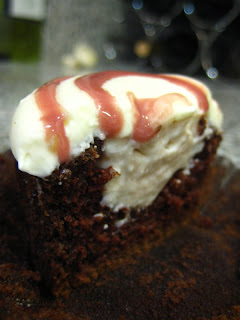
Then I piped little swirls of the brie-cream cheese frosting on top of each cupcake, followed by a swirled drizzle of the reduction glaze.

The overall flavor was not too sweet, creamy, and with a kick of wine flavoring that was super satisfying. And it made a pretty cross section too!

Words of improvement might include using a reduction to set the gelatin, that way the cream has an even more potent wine flavor. Once you add all the other cream ingredients, it gets a little over-powered.
Also, the reduction drizzle didn't stay pretty the whole time. It never quite hardened, so the top half and the bottom half of each line got misshapen. I am not 100% sure what my solution is, but it would probably be a cooked glaze. Only experimentation will tell though.

Also, unlike most cupcakes I make, I felt these ones need to be refrigerated due to the high dairy content and the gelatin.

And please, don't eat these cupcakes and drive ;)

Sunday, August 30, 2009

Rum Raisin Cupcakes

September's cupcake of the month flavor was inspired by the ever popular (well, at least cult-like popular) "Talk Like a Pirate Day," which is coming up the 19th of this month. If you aren't familiar with this festive holiday, it's really quite a simple celebration of grammar: you just have to drop your "arrr"s all day.

In the piratical spirit, I felt like rum was the only neccessARRRy ingredient. Unsure of what kind of pairing would go with Rum that would compliment but not overwhelm it, I decided rum raisin. Inspired by an ice cream flavor that my friend Becca used to order back in my Brooklyn days. Now personally, I'm not a fan of raisins, so I had to resort to the opinions of my taste testers to see if the recipe was a winner. Luckily, it has passed the test.

My recipe was fairly straight-forward, but a little time consuming. I made a pretty standard "off-white" cupcake, but used all brown sugar and added a couple tablespoons of rum in place of some of the milk (and actually forgot vanilla.... I will probably use vanilla though if I make them again).

While those were baking, I soaked some small dark raisins in rum and brown sugar and put them over a double boiler until the raisins seemed plump and the liquid had turned syrupy. Not a very technical explanation, so if I had to guess, I'd say I used 1 cup of raisins, 2-3 tablespoons of Rum and 1/4 cup of brown sugar. Once that was ready, I put it into my food processor, added about 1/4 cup of roasted pecans and pureed it into a sticky paste. I actually added more rum to thin the solution out a bit so it was more spreadable.

Then I made some butter rum glaze. Over medium heat, melt 6 tablespoons of butter, 3 tablespoons rum, 3 tablespoons water, and 3/4 cup of sugar. I let the solution boil a little and then took it off the heat and let it cool. It does form a skin, so you can either cover it or mix it once in a while to keep it fluid.

Finally, I made rum buttercream which was just a regular buttercream recipe that used rum instaed of milk. 1 C butter, room temperature beaten until fluffy. Gradually add 4+ cups of powdered sugar and approximately 4 tablespoons of rum and whip until creamy and fluffy.

To assemble, spread raisin puree/compote evenly over the top of the cupcake. Using a pastry brush, cover compote with glaze. Top with buttercream and of course, a little raisin so everyone knows what to expect.

4 Flavors

A simple way to add variety to your life, I made a batch of devil's food cupcakes and topped them with 4 different flavors of frosting. Only a little extra time for each frosting, but totally worth it to spice things up.

Flavors, clockwise, starting from front.

Flavor 1: Strawberry
Regular buttercream frosting, but with fresh strawberry puree instead of milk. I topped the cupcake with the frosting, then spotted it with a couple sesame seeds and mint leaves to make it look like a strawberry top. No food coloring was used, but it could be cute to make it a little richer in red color.

Flavor 2: Kahlua
Buttercream made with Kahlua instead of milk and topped with a sprinkling of cocoa powder.

Flavor 3: Grand Marnier
Buttercream made with Grand Marnier instead of milk. Should have added orange juice or rind to the frosting mix, because the Grand Marnier by itself wasn't quite cutting it. I did top it with candied orange rind pieces, but it didn't add enough flavor.

Flavor 4: Hazelnut
First I spread a little Nutella on the cupcake, then I put on a layer of Frangelico buttercream. Topped with a hazelnut.

Wednesday, August 12, 2009

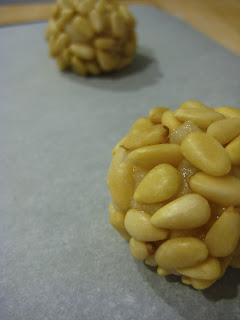
Pignoli Cookies

These cookies are one of my favorites. Definitely a treat, these moist, chewy and flavorful cookies are made almost entirely of almond paste. In fact, they could be gluten free if you chose not to use the moderate amount of flour that's suggested in the batter.

These cookies are apparently Sicilian in origin. They are often made around the holidays, but I see no reason to not enjoy them year round.

The recipe is very easy. I used a food processor to make the dough, which made it very easy and quick. Most recipes called for almond paste in a can because it's softer, but I only have access to the tube kind, so my quantities were off by an ounce, but nothing seemed to be ruined because of it.

  • 1 (8 oz) Can Almond Paste
  • 1/2 C Granulated Sugar
  • 1/2 C Powdered Sugar
  • 1/4 C Flour*
  • 2 Egg Whites (this amount can vary depending on how moist the dough gets. Start with 1 white and only add more if necessary)
  • 8 Ounces Pine Nuts
  • Extra Powdered Sugar To Finish (I forgot to do that part - woops)
Preheat to 300 F.

In a food processor, pulse the almond paste into small pieces, and add the two sugars and the flour (* recommended, but could make it without). Once those are mixed thoroughly, begin to add the egg whites a little at a time, just until the dough comes together.

I used a small cookie scoop to divvy up the batter. At each spoonful, I tossed it with the pine nuts and placed on a parchment lined cookie sheet. No need to flatten - a sphere of cookie dough will bake into a nicely rounded mound that is super moist and chewy on the inside while crisp outside.

Bake for about 25 minutes until lightly browned. The pine nuts will add such a nice warm and nutty flavor to the already super almondy dough - amazing.

Once they cool, I suppose that's where you're supposed to sprinkle them with powdered sugar. Go for it. I'm sure it's lovely.

I was only able to get about 10 cookies from this recipe, but they are totally worth it.

Saturday, August 8, 2009

Black and White Cookie

A true New York specialty, I definitely miss having a good black and white cookie after grabbing a sandwich at the deli. There is a lot of history and culture surrounding the black and white. It is by definition a cookie that is actually cake. Supposedly created when bakers had leftover batter, they just added a little extra flour to thicken it up so it wouldn't spread too far on the pan. Proof that some of the most amazing things are based on very simple ideas.

There is also quite a ritual that goes into eating the cookie. Which side do you like better? Do you eat the black or white first? Do you take a little bit of each? I was reminded of a Seinfeld episode that touched on the process of eating the cookie and it's ability to defy racial barriers. Regardless of which side you like or eat first, the cookie is overall quite delightful. Spongy like cake, with a high cake to frosting ratio, it is the perfect sweet end to any meal.

After an experiment and advice described by smittenkitchen's entry (thanks), I ended up making my cookie dough by varying my basic off-white cake recipe. Yielding only about a dozen large cookies, this recipe can be doubled, halved, made into a bunch of small cookies, made into bigger cookies (not recommended, as the cookies are actually quite fragile and will easily break in half if made too big). They are also best served fresh. Deli's tend to wrap them in plastic wrap to ward off the elements, but I doubt if you brought these cookies to a party there would be any concern for what to do with leftovers. They also don't do so well with stacking because the glaze is tacky and although "hardened" - still pretty moist. putting layers of wax paper in between the cookies seemed to work well enough to keep them separate for transport though.

Ok, so recipe goes:

  • 6 tbs butter, room temperature
  • 1 C sugar
  • 3/4 C flour*
  • 3/4 C cake flour*
  • 1 tsp baking powder
  • pinch of salt
  • 2 eggs
  • 3/8 C milk
  • 1/2 tsp lemon extract
  • 1/4 tsp vanilla extract

Preheat oven to 375˚. Line baking sheets with parchment.

Sift together dry ingredients. I usually don't sift, but this time I thought it would be important to keep the cookies light and incorporate both flours evenly. Cream butter and sugar. Add eggs one at a time. Mix milk and extracts together. Beginning with dry ingredients, gently mix into butter, alternating with milk, ending with dry, being careful not to over-mix.

Drop by spoonfuls onto cookie sheet about 2 inches apart. *I found that they were hard to make into perfect circles, and might have been easier to work with if I added a little more flour, probably up to 1/2 cup more at most. Depending on the size you make the cookies, bake for 10-15 minutes, but check to make sure you just lightly brown the edges.

As they're cooling, start the glazes.
My proportions are not generous, but the recipe can be easily added to even as you're working, so if you need more you can make it as you go.

White Glaze:
  • 2 C powdered sugar
  • 1/4 C boiling water

Slowly mix water into sugar, making sure not to put too much water in. You might not need all of it. I like the consistency to be easy to spread and not very drippy.
So, these cookies are actually frosted on their bottom side, covering up the baking brown. Using a frosting or butter knife, spread the white glaze on one half of each cookie. The glaze develops a skin quickly, so make sure to move quickly so your unused frosting doesn't get too crystallized.
You will have about half the frosting left. Place that over a pot of boiling water to make a double boiler and then, add to glaze base:

Chocolate Glaze:
  • 1.5 oz dark or unsweetened chocolate
  • 1/2 tsp corn syrup
  • 1 tbs cocoa (optional, but I think it makes the "black" side look richer and darker than without)

Whisk together over the heat until chocolate has melted. This glaze is even more sensitive to thickening and crystallizing while you're working with it, so be sure to have more boiling water handy to thin it out as you work. Spread chocolate along other half of cookie.

Let them set up for a while before diving in, but then enjoy! I was told by a kind lady in my office that these were better than some she's had at Deli's in both New York and LA. My only defense was that I knew mine were very fresh, and that the deli's might not have been as much. Of course I'd love to believe that mine were actually better, but in the interest of keeping the peace, I will "look to the cookie."

Tuesday, July 28, 2009

Rocky Road Cupcakes

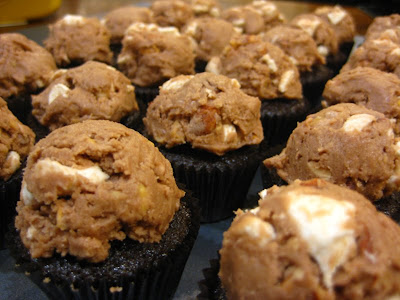
Further inspired by a delicious flavor of ice cream, I have been dreaming up the perfect Rocky Road Cupcake recipe for days. After many debates about how to construct it, I decided to do a simple but delicious chocolate cupcake therefore allowing the frosting to fulfill the role of "Rocky Road."

Marshmallows are pretty amazing and are incorporated into some really awesome desserts out there, but I'm not the kind of person you'll find eating Peeps. I have limits. Rocky Road ice cream might be my favorite way to enjoy marshmallows, but I am always game to snack on a rice crispy treat, gobble down a fireside s'more, or scatter mini marshmallows on top of my sweet potato casserole. So it's with this recipe that I'm trying to find a way to put the marshmallows to good use, without them being an overwhelming flavor.

I used my standard chocolate buttercream frosting as a base. For each half a cup of butter, I use 2 1/2 cups of powdered sugar and about 1/4 cup cocoa powder. After creaming the frosting with a little bit of vanilla and milk, I added in mini marshmallows and toasted almonds, both chopped up a little. I let it chill in the fridge, unlike when I usually pipe frosting in which case I let it sit out to soften enough to manipulate. After the cupcakes had cooled, I was able to scoop the chilled frosting with a cookie dough scoop which made the perfect sized ice cream-looking toppings.

My only changes would be to not toast the almonds as it changed the flavor a bit, and I think the raw almond taste is more appropriate. As well, the frosting to cupcake ratio was a bit more than I like. Overall though, the flavor did capture the classic combo.

Sunday, June 28, 2009

Honeycomb Candy

I first tried this candy while on a trip to Ireland. I had never even heard of it before, which is a shame, because it's quite the addicting little treat.

Knowing that I had never heard of it before, I assumed many of my American compatriots were in the same boat, so wanted to expand their horizons as mine had been. So I whipped up a batch of this relatively easy confection and brought it in to work. I was amazed at the response I got (mind you, my coworkers have all come to expect that there will be sweets of some kind adorning the front desk, unfortunately making my treats somewhat unspecial). But in this case, many people were coming back for 3rds and 4ths, and a number of people even knew what it was (!). One lady said she used to make it every day as a kid in Korea; it was her childhood favorite. So I don't know why American's were denied this experience, but hopefully we can work through that fault and embrace the crunchy, crispy deliciousness that is honeycomb for ever after.

One note of caution: While on the stove, don't let the sugar mix go beyond 300 degrees. Luckily, the recipe is simple, easy, and fast, so failing in my first attempt was not terribly discouraging and continued to try it again. But the first batch was definitely burned and carmelized, which is not the correct texture or taste. Made for an awesome photo though.

So, the recipe is
  • 1/4 C water
  • 1/4 C corn syrup
  • 1 1/2 C sugar
  • 1 tbs baking soda

Prep a cookie sheet or jelly roll pan with some parchment paper and set aside. In a medium sauce pan, bring the water, syrup and sugar to a simmer over medium heat and don't stir. Let it bubble its way up to 300 degrees fahrenheit (until the liquid is the color of light straw) and then immediately dump the baking soda into the pot. Whisk rapidly incorporating the soda into the sugar mixture as thoroughly as possible. The mixture will start bubbling up quite violently and turning the mix into a honey color. Pour the mix onto the parchment paper and let it rest for 20 minutes. Any fussing with it and the air bubbles will deflate and you will lose the quintessential "honeycomb" look that is caused by the soda forcing air throughout the toffee-like sugar mixture. The ideal outcome, is a very porous, crispy, sticks to your teeth texture that tastes something like butterfinger/caramel and melts in your mouth. There is a distinct baking soda taste to it too, but not in a disagreeable way. It's quite a delightful way to get your sugar fix.

Once it is set, just chop it roughly with a sharp knife. I like to get sizeable pieces and then the little bites just happen because the candy is too brittle to cut into perfect shaped or sized pieces. You can also cover the pieces with chocolate, which is amazing. In fact, Cadbury has a chocolate covered Honeycomb bar that is commercially sold over there (why not here?!!!).

So from Great Britain (or wherever it originated) to you: enjoy!

Saturday, June 13, 2009

Gooey Butter Cake

It is what it sounds like!

The idea was brought to me directly from St. Louis via my boyfriend's parents who were visiting over Memorial Day weekend. Having never heard of it, the name was a quick selling point. Apparently a very St. Louis kind of thing, I figured the west coast needed to be introduced (including myself) so ventured to try it.

Not sure if she was the founder of said Gooey Butter Cake or simply the one who made it popular, but it appears we have Paula Dean to thank for it. So saying, I believe the confection holds up to the Southerner stereotype that if it's going to be good, it's going to be clogging your arteries. Yum. Luckily it's pretty rich, so unlike some of those scorpion-style confections that you find you can eat tons of, but are extremely bad for you, this treat should and really can only be consumed in small portions.*

So the original recipe calls for a box of cake mix. Once we look past that minor indiscretion, we can get excited about the recipe that is the "gooey". I find it's a close relative to that cream cheese filling you can optionally put into brownies, which is also a close relative to cream cheese frosting. Yeah, I said cream cheese frosting. But it's BAKED in. Genius.

For experiment's sake, I made what you would consider half a batch. Please double at your own discretion.

So I started with a variation on yellow cake. My variation went something like this:

sift together and set aside:
  • 1 C flour
  • 1 tsp baking soda
  • 1 C sugar

mix together:
  • 1/2 C butter, melted
  • 3/4 cup milk, curdled with a tsp of vinegar (aka buttermilk - I didn't happen to have any, hence the substitute)
  • 1 tsp vanilla
  • 1 egg

Add dry ingredients to wet.
Yeah, that's it.

Pour this mix into the bottom of a 9x13 pan (I line mine with parchment to keep things easier to clean/cut). You could also do a 9x9 with the final product being a bit taller (could be good).

Next, make the gooey:
  • 1/2 package cream cheese (4 oz.)
  • 1 egg
  • 1/2 tsp vanilla
  • 1/2 box powdered sugar (approx. 8 oz.) (if I had to guess, which I did have to, I'd say that's somewhere between 2-3 cups)
  • 1/4 C melted butter

Blend cream cheese until smooth. Add eggs and vanilla. Then add the sugar (I dare you not to make a mess of it) and make sure it's smooth. Then pour in the melted butter.

Pour that mixture over the cake batter evenly. I smoothed mine out and made pretty swirly designs which ended up being visible after baking, so I recommend it (if you care).

Bake for 30-40 minutes (and add more time if you double the recipe). But I guess this is where you just do what you think is best because if you insert a toothpick in the center, well... it's going to be gooey. So I just make sure the cake looked pretty well browned on top (where it was popping through the filling) and made sure it cooled completely before digging in.

Cut, and enjoy!

I also tried one variation with chocolate cake and peanut butter gooey, but we ate it before it cooled so the photos would have been discouraging. They were adored by the consumers, nonetheless.

*That is totally an opinion. I'm sure there are those who would challenge my position. At their own risk, of course.

Monday, May 25, 2009

Mochi Cupcakes

Inspired by a recipe my dear friend kristy linked me to, I could NOT not try making some Mochi cupcakes of my own. Being a pretty die-hard fan of the real Japanese confection, I thought it would be a perfect specimen to indulge my desire to turn everything into a flavor of cupcake.

Now, Americans have already had their way with mochi by filling it with ice cream instead of the traditional sweetened bean pastes and such - a convention I whole heartedly approve of, by the way. *two-thumbs up* So me taking it a step further doesn't seem too outlandish. The difference between an American cupcake and a mochi cupcake lies simply in the choice of flour. Made with a gluten free "sweet rice flour" instead of wheat, the pastry's texture comes out much chewier. It has a distinct rice flavor that even the copious amounts of sugar and eggs can't hide. Traditional mochi is made with just rice flour and water, heated until it becomes a pliable paste which is then wrapped around the choice filling. So as a cupcake, it travels outside it's main purpose as a wrapper and becomes the foundation of the dessert.

For my mochi cupcakes, I made a "plain" cupcake and topped it with red bean paste and red bean buttercream. Inspired by a two-layer frosting technique my boyfriend documented on his month-long vacation *jealous* to Japan *also jealous*, I thought this cupcake flavor was all to appropriate to try it out on. The paste was very easy to make, thankfully, and I even got away with cheating a little bit. Following the instructions pretty much verbatim, I boiled the red beans (acquired at 99 Ranch Market - or is it Ranch 99???) for about an hour and half, drained, mixed with sugar, pureed, then reheated to evaporate the excess moisture and wow - it worked! For those of you not familiar with Red beans... I'm not really either. They're smaller than generic pinto beans, but I couldn't tell you what is distinct about their flavor. And I also can't tell you why the Japanese thought they would be good as a dessert food (beans? for dessert??), it just works. They also use lima beans in the same way, and let me tell you, they simply prove that sugar makes ANYthing taste good.

Anyway, so after the cupcakes were cooled, I made little balls of red bean paste and plopped them on top of the cupcakes and then made a buttercream frosting with the remaining paste (1/ c butter, 2 c powdered sugar + paste and a little water to thin it as necessary). I admit, I wasn't sure if buttercream would be the best with this kind of cupcake. The cake is not "light" but it's not rich either, so I was afraid that the frosting might be too sweet or creamy for the texture of the cake, but all who tasted seemed to be in favor of the combo.

With the remaining cupcakes, I made a green tea buttercream (with macha (Green Tea) powder, acquired for me on previously mentioned month-long vacation - thanks!) which was tasty, but was not nearly as cool and delicious as the double layered red bean mochi flavor. Note: no food coloring was added - all color is from the green tea powder!

But I will be continuing this line of desserts for sure. It is a unique and delicious treat that I want to share with all who either love mochi in it's true form, or have no clue what it is and need to be made aware!

Tuesday, May 5, 2009

Cinco de Mayo Churros

I know that this holiday is a highly fabricated, American excuse to drink Margaritas and eat chips, but I do embrace most holidays that are food-focused, so I went all out this time. I made desserts for a fund raising event that was being held today in honor of the dubious holiday. And what better excuse to make churros! I love these little treats. I made mine especially bite size - better known in the diminutive as "churritos." It's amazing how many of these little tasty treats you can pack away!

Churros:
• 3/4 C sugar
• 1 tsp cinnamon
• 1 C milk
• 6 tbs butter
• 1 tsp salt
• 2 tsp sugar
• 1 C flour
• 3 eggs, lightly beaten
• frying oil (i used Canola)

Make cinnamon sugar for the final coating. Set aside in bowl or plate.

Begin heating frying oil over medium heat (looking for a temperature of 325˚).

Bring milk, sugar, butter, salt and 2 tsp sugar to boil over medium heat.
Add flour all at once, cooking and stirring (wooden spoon worked best) until it forms a ball; about 30 seconds. Removed from heat and let cool; 3 minutes is fine. Beat in eggs one at a time making sure to fully incorporate.

Fill pastry bag (or in my case, awesome pastry gun) with the filling. Using the star tip, slowly squeeze out desired length of churro. I did mine no more than 2 inches each, and just scraped the tip to release the batter for each churro. I'm sure there are many ways of doing it like cutting the dough with scissors or bribing someone else to help you, but this worked well for me. I only was able to squeeze 6-8 churros per batch since I was having to rotate them in the oil for even cooking. The recipe says to cook them for 5 minutes, but just use your judgment. I like them golden brown, and a little squishy, not crunchy. But they are incredibly resilient and taste great no matter what you do (aside from burning of course).
Pull each batch out and degrease on paper towels. When they're cooler, toss around in the cinnamon sugar mix until well coated.

Since I had to make mine a day ahead, I waited to put the sugar on and simply reheated the pre-fried tasty morsels on a cookie sheet in the oven for no more than 2 minutes at 425˚; then I gave them a good toss in the sugar.
They really are best warm, but who's picky?

Just a side note, taking photos with one hand while deep frying things in the other is probably a bad idea. I survived this round, but am going to exercise more caution if I ever get the brainy idea again.

Another note. Churros are really good, so they're worth any trouble they might cause in order to make them. My major complaint this time is how much I hate the smell of oil frying filling every crevice of my apartment. It gets stuck in on my clothes and in my hair for days after.

On a related note, I have a shameful admission: If the labor of making Churros sound daunting or time consuming, I can't help but recommend the quick, cheap and amazingly delicious alternative of a Costco Churro. I don't know how they manage it, but I actually have a hard time even driving by Costco without having to fight the urge to go in and get one.

Anyhow, feliz Cinco de Mayo!

Tuesday, April 21, 2009

Flan, Chocolate Tiramisu, Strawberry Shortcake & Almond Cupcakes

For a combination of reasons, a friend came over to have a bake date last Saturday and we made 4 varieties of cupcakes. It was amazing how much quicker it went with the extra help! And the input and feedback was great. We had a couple genius breakthroughs that wouldn't have happened if I were working through it on my own.

I think the highlight of the day was the Flan cupcake. I had been experimenting with custard frosting before, with less than enthusiastic success, so was determined to get it really good this time. I had a recipe I swiped off the interwebs that went something like:

• 1/2 cup sugar
• 2 heaping tbs of flour
• 1 egg
• 1 cup milk
• 1 tsp vanilla
• 1/2 cup butter
• 2 tbs p. sugar

It sounded believable. The first time I ever made it, I was trying for a mocha frosting and thought that custard would be a really nice way to richen it up. I should have taken better notes on how thin and runny the result was the first time, but I hadn't figured out the science of why, so blazed on.

The instructions for this custard frosting:
mix sugar and flour, then add egg and milk and mix together with vanilla. Heat until thickened, then cool completely. Then, whip together the butter and powdered sugar, gradually adding this custard to the butter.

STOP.

Don't do it. I don't know why. I almost don't care how. Just DON'T do it.

Separation. If you want your custard look like grits, yes, use butter. If you want your custard to be a runny mess, then yes, powdered sugar is the answer.

Is it because the milk in the custard is JUST too liquidy? Too much for the powdered sugar to compete with that it turns your delightfully firm and gelatinous custard and whips it down into a confectioner's icing instead? Does the liquidy milk fight with the fatty butter?

So after 2 batches of custard were basically wasted, we figured out that just piping cooled custard straight on to our caramel cupcakes was good enough, that's just what we did. And quite a delightful texture it was. In our excitement, we piped up a bunch of cupcakes, mini and regular alike, and set little pools of highly viscous caramel into the custard cup. Merrily we worked until I realized: wait. The custard is breaking! Literally cracking apart under the weight of the caramel. Slowly, all our efforts began to look like remnants of some ancient cupcake culture as they crumbled to their decripit fate.

So now what? Is this project supposed to fail miserably? I want so badly for it to work because the potential is so high. One batch of custard more and we realized that patience was the only ingredient we were missing. Custard, like most milk-based products, once heated develops a sort of protective skin. We simply hadn't waited long enough for that skin to form in order to load the heavy caramel onto it. Once the custard had set, this experiment finally received the seal of deliciousness.

Sunday, April 19, 2009

Bridal Shower Bake-off

A couple weeks ago I had the privilege of hosting my best friend's Bridal Shower. Back story is that I'm terribly anxious about the whole wedding scenario and all the responsibilities I have with the maid-of-honor role. I've hardly been to any weddings, much less participated in them, so I feel a bit overwhelmed with it all. On top of the fact I'm torn between enjoying the big family/friend get-togethers that weddings provide, and disliking the kitsch that usually goes into putting them on. All the traditions, taboos and conventions seem very contrived in this day and age, and have my head in a whirl.

So, initially I was pessimistic. Despite my best efforts, I don't think I hid it well, and felt bad that my best friend was lacking the proper "squeal" reaction most other girls might have provided upon seeing her ring, or hearing the proposal story, and all those other cutesy things girls go ga-ga over. I AM happy for her, and I think she's found a great match. She told me she appreciated me for the way I was, which was comforting, but I feel sorry for her that someone else hasn't fulfilled the role of "squealer," to help satisfy that inherentaly girly attribute. (Or maybe someone has and I don't know about it).

The other funny thing worth mentioning is how adament my dear friend has been about not being a Bride-zilla. She goes out of her way to make sure that she's kind and considerate of those around her involved in the planning process, and while she knows what she wants, she's not stepping all over people to get it. I appreciate that, but am also amused at how concerned she is, second guessing herself occassionally: "That wasn't too bridezilla was it??"

Well, apparently I'm a bridesmaid-zilla. Yeah. Out of this meek and mild-mannered girl grew this beast of anal-retentive perfectism I did not know existed. I'd like to think I was at least nice about it, but I sure did have an opinion about how I wanted her bridal shower to look, taste, flow and almost fit it to a budget (thanks mama, for helping with the rest!). What's funny is how I had no idea how picky I could be. So, lesson learned is that if I ever get married and do the big ol' fancy wedding: watch out world!

Anyhow, the funnest part was making the food, of course. The idea was high tea (er... well, it was really afternoon tea, and by tea, I mean beer and mimosas. I'm pretty sure only 1, maybe 2 cups of tea were actually poured the entire afternoon). But it did include tea sandwiches (egg salad with watercress, chicken salad with almonds and celery, and cucumber with cream/goat cheeses), spanakopita, pigs in blankets, proscutto wrapped dates, brownies, mini carrot cupcakes, and the prize of the event: Angel food skewers.


I had made some angel food cupcakes which tasted quite fine, but were seriously lacking presentation awe. It had been the one request my dear bride-to-be had made, so I felt compelled to fulfill it with extra umph. So I cut up the angel food into squares (just before the party started, as they did dry out the longer they were out), then popped them onto bamboo skewers, alternating with fresh strawberries and then providing a whip cream dip along side them. For presentation, I sliced some fresh pineapple and laid it on a plate, skin-side up, tied it down, then poked the skeweres into the pineapple so they stood straight up. It looked fantastically dangerous, which is a good way to describe my friend, so felt extra clever for coming up with it.*

*I totally stole the idea from a caterer whom I'd witnessed doing the exact same technique with fruit salad skewers not a week earlier. I didn't have to tell you that. I could have taken all the credit and no one would have known.

Tuesday, March 31, 2009

300 Desserts

I had my biggest order yet. 300 desserts for my company's party. 8 dozen cookies, 4 dozen brownies, 2 dozen regular cupcakes, 8 dozen mini-cupcakes and 4 dozen truffles. It was a long wednesday evening. With the help of Barb and the generous offer to use her dad's dual oven kitchen, we made it through. I felt the need to document the copius amounts of butter needed to accomplish such a task. They're like my little minions, eager to do my bidding!

The event was definitely a success, but there were some lumps in the batter, if you get what I mean. I have never made mini cupcakes, mostly due to the fact I have a friend who has a monopoly on the mini-cupcake market and I didn't feel like I should compete. But the interest and demand for them was too great for me to ignore it any longer. So, first off, I could not find the proper mini-cupcake baking pans that I was vying for. I searched in many stores, but only was able to find the crazy-weird, floppy, silicon type pans that I find very unappealing. But due to a time crunch, I was forced to purchase them. Granted, once using them to bake, I suppose there wasn't anything "wrong" with them - I just don't like 'em. Anyhow, the other issue worth mentioning is that I like my cupcakes the same way I like my meat: medium-rare. Loosely translated into bake-speak I mean: I like them moist. This means keeping a close eye on the goodies in the oven, and sometimes pulling them out before they're "technically" ready. Works wonders for chewy cookies and ooey-gooey brownies, but as it happens with confections like cupcakes, there is a delicate balance between "al dente" and flop. I found flop. When I first removed the batch from the oven, they looked alright, but it was not to be. Luckily, it was fun to watch them slowly deflate. Alas, they did not make it to the party.

One more technical note: Oven temperature matters. My buddy and I did a couple dozen mini-snickerdoodles at too low a temperature, and they tasted fine, but were pale and flat in comparison to their properly-baked brethren.

The night wore on. Barb and I had resorted to mostly grunting and nodding our heads to show signs of direction. We were conserving energy since we had no real idea as to how long we would need to persist (I'm learning how to gauge the timing as I go). I made a fine batch of brownies at 2 am, followed immediately by a batch of indiscernible what-the-hell-happened-to-these brownies that I am still not certain what went wrong.

I was too busy to take any good photos - we worked from 8pm - 3am and had to wake up straight away at 7 am in order to get back to real work on time. This is the price I (we) pa(id) to see so many people enjoying our creations. I would do it again, but I'll have to find a way to not drag my friends down with me into the wee hours of the morning.